• Skip to primary navigation
  • Skip to main content
  • Skip to primary sidebar
  • Skip to footer
The Budget Diet

The Budget Diet

Earn, Save & Live Smart.

  • Make Money
    • I Made $62,430
    • Rebate & Cashback Apps
    • Surveys That Pay
    • Side Gigs
    • Career
  • Smart Money
    • Saving Money
      • Save $400/mo
      • Budgeting
      • Coupons
    • Loans
      • Personal Loans
      • Auto
    • Bank Accounts
    • Investing
    • Debt
    • Insurance
    • Taxes
  • Smart Food
    • Meal Delivery & Subscription Services
    • Groceries
    • Recipes
    • Dining Out
  • Smart Life
    • Seasonal & Holiday
      • Summer
      • Valentine’s Day
      • Mother’s Day
      • Father’s Day
      • Lent
      • Easter
      • Fourth of July
      • Halloween
      • Thanksgiving
      • Christmas
    • Cheap Dates
    • Frugal Living
    • Cheap Thrills
    • Baby / Children
    • Utility Bills
    • Books
    • Clothing & Accessories
    • Electronics
    • Gifts
    • Health & Beauty
    • Home & Garden
    • Weddings
    • Pets
    • Back to School
    • Home Decor
    • Travel
    • Earth Friendly
  • About
  • Rebate & Cashback Apps
  • Cut Spending by $400 a Month!
  • Investing
  • Recipes
Home » Smart Money » Budgeting » DIY Glitter Jar: Fun and Relaxing to Make

DIY Glitter Jar: Fun and Relaxing to Make

Last Updated on November 17, 2015 by The Budget Diet Team

We are a reader supported blog and this page may contain affiliate links. When you buy something or sign-up through our links we may earn a small commission. All opinions in this article are the author's alone.

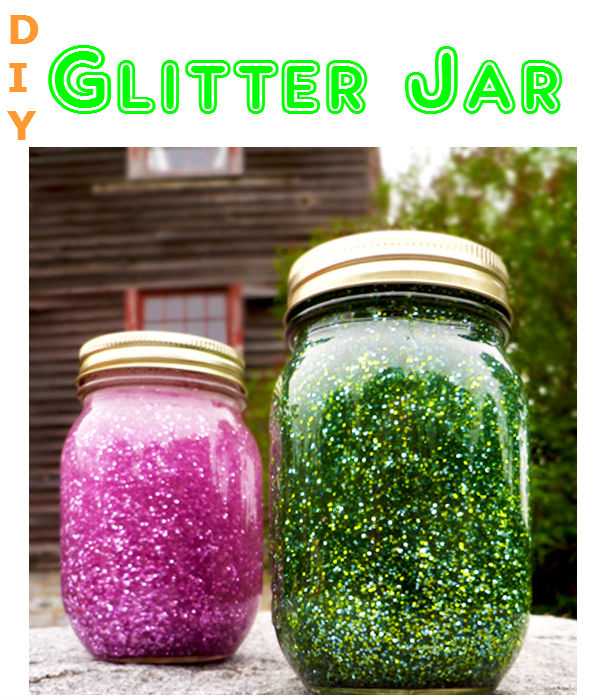
Add sparkle to your home with this super easy DIY glitter jar. It creates a relaxing effect that kids and adults can enjoy.

Kids love glitter jar because of its sparkling colors. Adults also love them because of its relaxing effect. Moreover, it is a good decor for your living room.

Follow these simple steps to create your own stunning and fascinating DIY glitter jar.

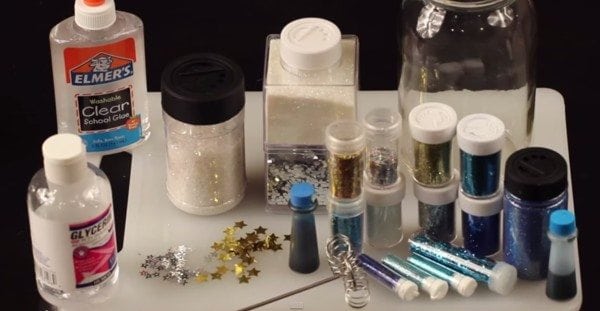
Materials you need:

  • Clear school glue
  • Lots of glitters
  • Glycerine (optional)
  • Clean jar with lid
  • Food coloring
  • Wisk

glitter jar

Choose the size of your jar depending on your preferences. Clean it up. Have different colors for your glitters. You can also have small cut-outs from shiny paper, this will surely make your jar vibrant. Moreover, don’t forget to include fine glitters. If you have prepared all the materials and you are ready, then let’s get it started. First, fill one-fourth of your jar with boiling water from the kettle.
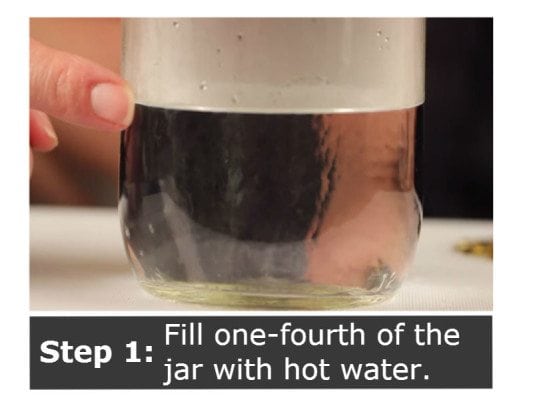
Diy glitter jar

Pour one-half of the full container of clear glue into the jar. The more glue you add, the slower the glitters will descent to the bottom, which is the goal. Add about two tablespoon of vegetable glycerine, this is optional. It makes the glitter swirl around the jar. Then, stir the mixture.
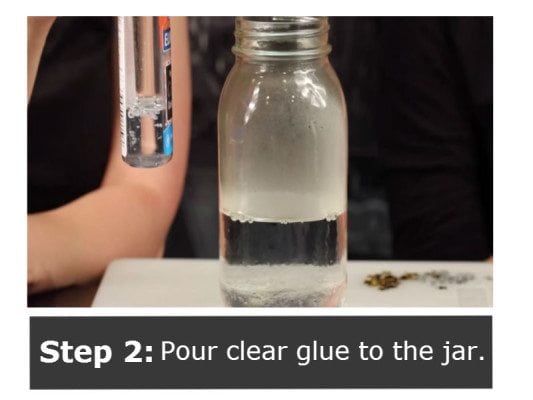
Diy glitter jar

Then, add food coloring. You can choose any color you desire. Now, stir it. Next, pour the glitters into the jar. You will add a lot of glitters and ending up half a cup of glitters at the foot of the jar. Just a piece of advice – having silver, white and gold glitters will add sparkle to your jar. Once you have dumped all your glitters, it is time to stir it up.
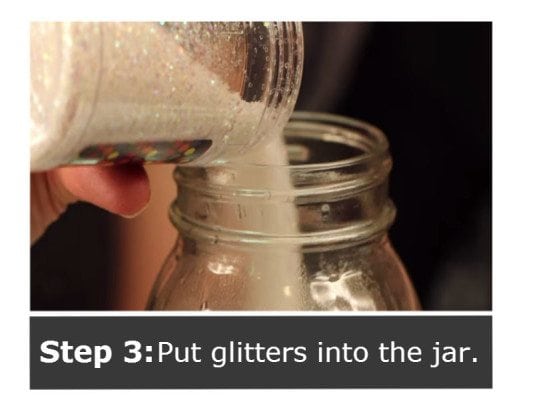
Diy glitter jar

Again, pour hot water to the jar filling it up and make sure the water and glitters are mixed well. Now, it is time to cover up the lid. Trace it on the glitter fabric. Cut the circle out and secure it on the lid. Close the jar tightly with the gleaming lid. Finally, shake it!
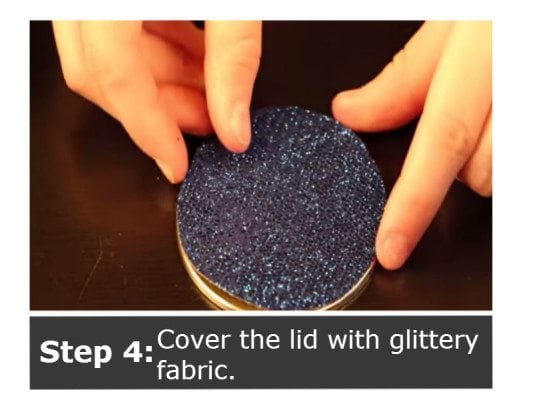
Diy glitter jar

You and your kids will absolutely enjoy the swirling glitters in your jar.
Watch How it is Done

Tweet
Pin411
Share4
415 Shares

Related Posts

  • How to Make DIY Stained Glass Mosaic Jar

      You can create a fascinating look of stained glass with different glass colors and…

  • Creepy DIY Eyeball Necklace Jar

    Here's another creepy DIY project for Halloween. This gory eyeball necklace jar brings to mind Dr.…

  • fun on a budget
    Frugal Family Fun Jar

    If you're staying home for Spring Break, be prepared for the "I'm bored" syndrome with…

Filed Under: Budgeting, Home Decor

Must Read

7 Ways to Stow Your Stuff on a Limited Space

How I made $62,430 – Ebates

Leave a Reply

  Subscribe  
Notify of

Primary Sidebar

Search

Popular Posts

How to Save Money – 98 Ways to Cut Your Spending by $400 a Month!How to Save Money – 98 Ways to Cut Your Spending by $400 a Month!1M Total Shares
DIY Teeth Whitening for Any BudgetDIY Teeth Whitening for Any Budget916K Total Shares
Southern Homemade Baked Macaroni and Cheese RecipeSouthern Homemade Baked Macaroni and Cheese Recipe469K Total Shares
How To Make Oreo Balls Cookie Recipe | No BakeHow To Make Oreo Balls Cookie Recipe | No Bake363K Total Shares
How Not Using Coupon Codes Makes You a Savings RookieHow Not Using Coupon Codes Makes You a Savings Rookie277K Total Shares

Footer

The Budget Diet is all about showing you budget friendly yummy recipes and life hacks that shrinks your budget and earns you money. It’s not just a diet for your wallet…but for your waistline too.

  • About
  • Contact Us
  • Become a Contributor
  • Advertise
  • Free Newsletter
  • Home Decor
  • Organize My Life
  • Parties
  • Seasonal
  • Back to School
  • Christmas
  • Father’s Day
  • Fourth of July
  • Halloween
  • Mother’s Day
  • Summer
  • Thanksgiving
  • Electronics
  • Smart Life
  • Baby / Children
  • Books
  • Cars
  • Clothing & Accessories
  • Health & Beauty
  • Home & Garden
  • Homemade Gifts
  • Pets
  • Travel
  • Utility Bills
  • Weddings
  • Weekly Challenge

Copyright © 2021 The Budget Diet · The Budget Diet LLC
Made with in Seattle

  • Sitemap
  • Terms of Use
  • Privacy Policy
  • DMCA
  • CCPA Information
  • Do Not Sell My Information
  • Affiliate Disclosure
  • Contact Us
wpDiscuz