Do you love your job? I love mine. It's the best job I've ever had. I write for a living, something I have been passionate about since I was old enough to properly hold a pen. Plus, I get to do it from the comfort of my own home. When I started out a few years ago, though, I had no idea what I was doing. Countless hours of Internet research, learning, and even mistakes later, I am excited to share with you all how to start a blog and make money from it.
-
Get Started
To make money with your blog, you'll need a host site. There are many options for a host site out there, so you may wish to look at several before making a final decision based on your needs and budget. For our purposes, we will be discussing HostGator (@hostgator). Once you get to the homepage, you'll see a large yellow button labeled “Get Started.” Click on it to continue.
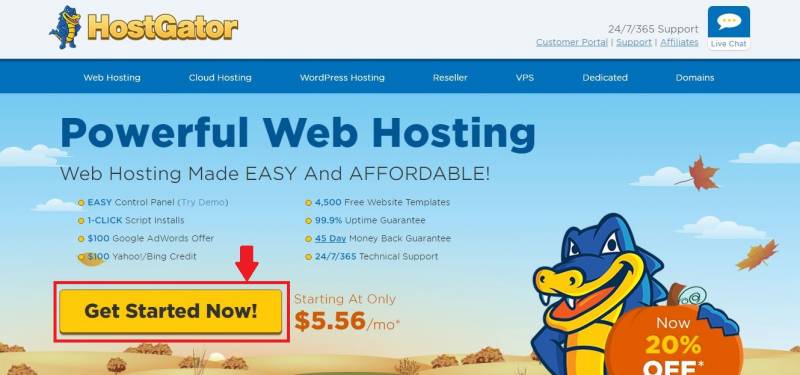
Image source: hostgator.com -
Select a Plan
This, for me, was the most difficult part of the process. I wanted to make sure the plan I chose was in my budget while still covering everything I needed. HostGator offers three plans: Hatchling, Baby, and Business. The main difference between the first two is that Hatchling offers single domain hosting, while Baby offers unlimited domain hosting. As Web Hosting Database (@WHdatabase) explains here, this means you can have any amount of domains you want for no additional cost and you can have more than one site per domain.
Domain registration is not free, so if you think you may wish to have more than one domain but don't need the extras included in the Business plan, the Baby plan is most likely the best choice for you. Once you have decided on a plan, click on the “Sign Up Now!” button to continue.
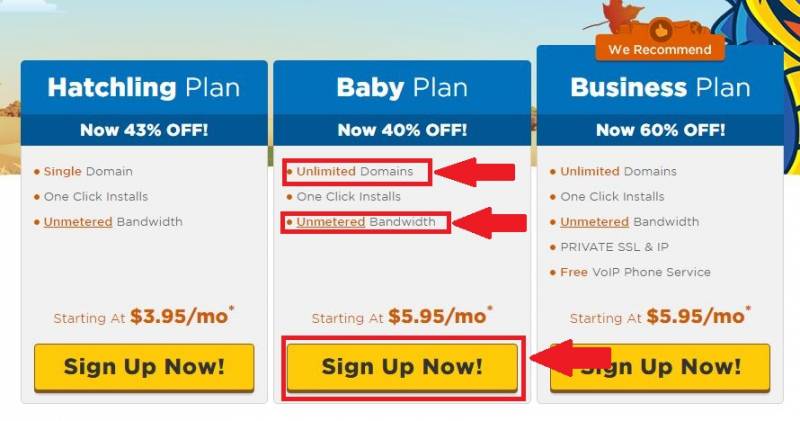
Image source: hostgator.com -
Choose and Register Your Domain Name
When you get to this step, you'll find that you have two options. You can either register a new domain, or you can select “I Already Own This Domain” and register a pre-existing domain with the new host site. Your domain name is your web address. For our purposes, we will assume you need to register a new domain. To do this, you will need to enter your desired domain and select your extension from the drop down box.
Once you have entered your desired domain name and selected your extension, you will notice a checked box at the bottom reading “Add Domain Privacy Protection for hosting. domain.” This privacy protection will help hide your personal information from public viewing. If you don't feel you need it, uncheck the box.

Image source: hostgator.com -
Review Your Plan
Here is where you can change your plan if you need to, and the duration of your package as well. You can pick a renewal cycle from one month up to 36 months. An invoice will be sent to you prior to your renewal date; the date of your invoice depends upon what item(s) are renewing. When I first started out, I renewed monthly due to financial constraints. I simply didn't have the money upfront to buy a domain for a year. This option's availability was the reason I was able to start my career. It may be an option for you as well, especially if you're not too sure about the blogging experience but want to give it a shot anyway.
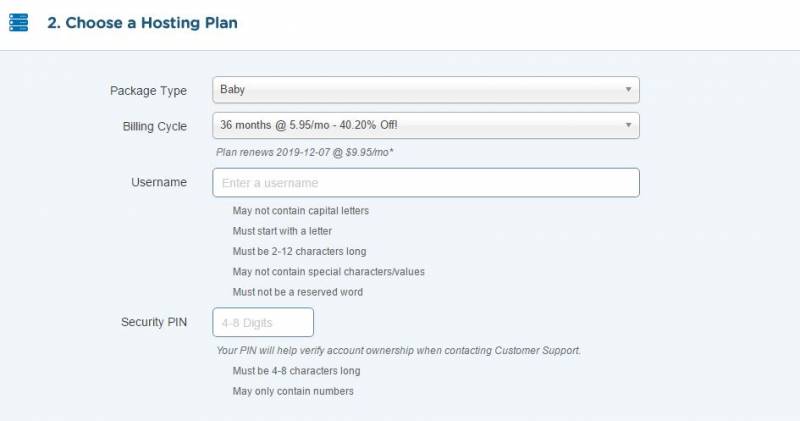
Image source: hostgator.com -
Enter Billing Information
As with any online purchase, we have come to the part where you need to begin inputting your personal information to complete the transaction. You will need your email address, name, address, phone number, and payment information. Be sure to enter the correct information, as you may be contacted for verification by the host site.
You'll find two payment options listed: credit card or PayPal. Should you select PayPal, you will be taken to the gateway page for that option.
This is also where you will find additional services such as Hack Alert, Site Backup, and other services. These are not required for a successful blogging career, but they do cost extra. If you feel you do not need or want them, uncheck the boxes before completing this portion of your registration.
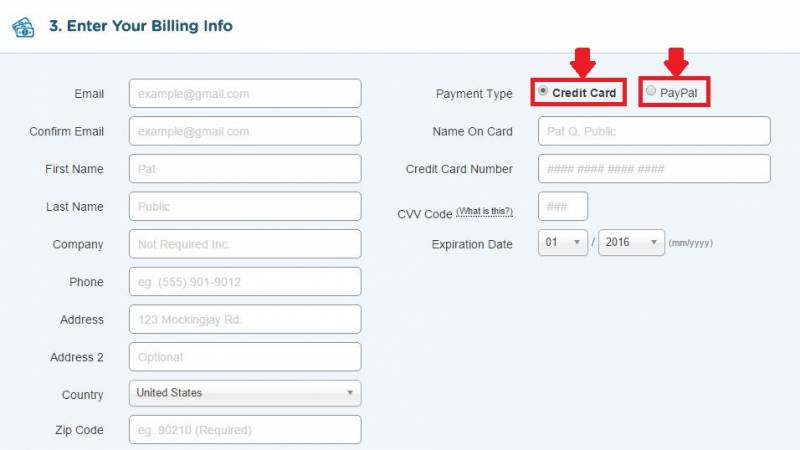
Image source: hostgator.com 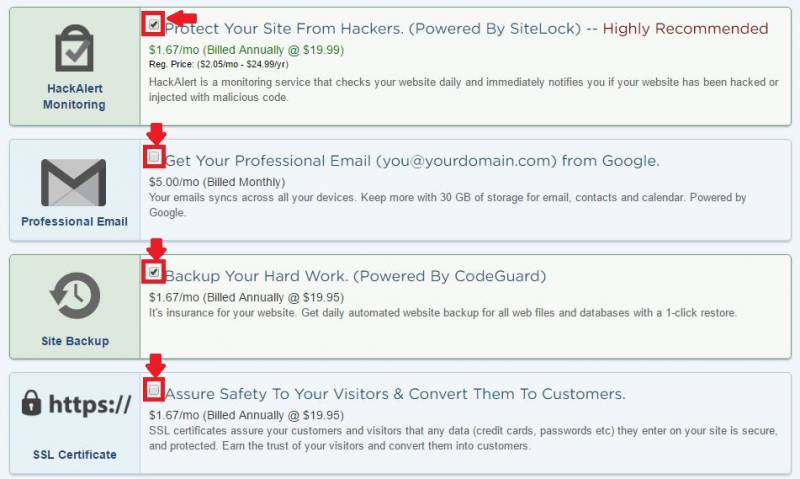
Image source: hostgator.com -
Enter Any Discounts or Coupon Codes
As I mentioned before, when I first started blogging and using a host site I needed to pay for, I didn't have much money. At the time, I didn't know where to begin looking for discounts or coupons for the site I used. Turns out, there are new coupons coming out frequently. Simply look for ones relevant to your needs with the host site and click on them to reveal the information you need.
Once you've found and selected your discounts, you can enter them into the field listed, as shown in the photo below.

Image source: hostgator.com -
Finish Up
Almost done! Before you check out, go back through your order and make sure it's exactly what you want and all the information is correct. As previously mentioned, you may be contacted for verification. This mean it's extremely important that you have the correct contact information filled out. It's also your last opportunity to make sure you have selected the correct package, with or without the add-ons of your choice, and any discounts you may have.
Once you're satisfied that all the information entered in the previous fields is correct and to your liking, select the “Check Out Now” button. Be sure to check that you have read and agreed to the Terms and Conditions.
Depending on your chosen payment method, you will either be redirected to the PayPal gateway, or taken to a successful payment page. Once all this is done, you will receive an email from the site confirming your order with the order details.
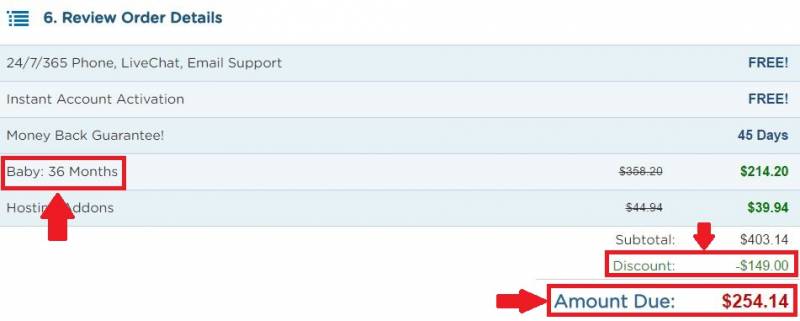
Image source: hostgator.com 
Image source: hostgator.com
Whether you want to make blogging your main source of income or just a side hustle, anyone can start a blog and make money from it. Choosing to do this changed my life; I am free to be with my children whenever they need me and I get to talk about the things that I am passionate about. That I get paid to do so is just the icing on the cake.