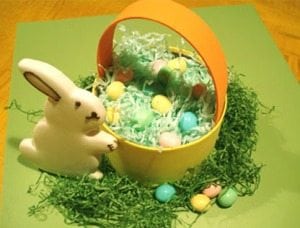
It's nearly Easter, and that means an Easter dinner with family and/or friends for people who celebrate the holiday. It is always nice to see a pleasing, Easter/Spring themed centerpiece on the Easter supper table . Additionally, it is so easy to create a recycled Easter basket, that you can make more than one for your children. Let's take a look at the 10 easy steps that you need to utilize, in order to create these delightful baskets.
Step 1 – Securing the Inner Basket
Think about what you have in your home to use for an inner basket. This can be something like a plastic milk gallon jug, paper food container (used for dry food, such as oats), or even utilizing a bread basket that you rarely use. Depending on how many baskets you would like to design, think about what would be easiest for you.
Step 2 – Securing the Outer Basket and Handle
The outer basket consists of either recycled construction paper or foam. Spring pastel colors like yellow, blue, orange, purple and pink are the most popular choices for Easter basket construction.
Step 3 – Securing the Tools to Create Your Basket
You will need a pair of scissors, a glue stick (or rubber cement), and either crayons, paints, or colorful markers that you will use to decorate the outer part of your basket.
Step 4 – Creating the Basket Portion
Ensuring that your inner basket is dry, merely cut your milk jug or dry food container in half. Set it aside.
Step 5 – Creating the Sides of the Basket and the Handle
Utilizing recycled construction paper or foam, fit pieces around the inner basket firmly. Cut the pieces out, then glue them around the inner basket. Cut a 3 inch by 18 inch strip of paper and glue it from the top inner sides of the basket for a handle.
Step 6 – Allowing for Drying Time
Learn what the drying time is for use with either a glue stick or rubber cement, or whatever you decide to glue your basket together with. Take that time and double it, if possible.
Step 7 – Designing your Basket
Utilizing either crayons, paints, a stamp kit, stickers or markers: now is the time to decorate your basket! If you have a child or children, this is a fun, creative family endeavor to work on together.
Step 8 – Filling your Basket
Fill your basket and place it in the middle of your Easter dinner table, unless you will use one or more baskets for children. Of course, part of the fun of Easter baskets is hiding them, so you might want to consider that.
Step 9 – Displaying Your Basket
If you choose to display your basket, think of placing it on either real or plastic “Easter grass”. Along with its contents, it is sure to delight your Easter dinner guests.
Step 10 – Storing Your Basket
When Easter has passed, store your basket using a large box that can accommodate height, with possibly a few more inches. Store it safely until the next year.
Following the ten easy steps above will help you to create one or more recycled Easter baskets that you can use for years, with the potential for minimal repairs to consider, on occasion.
~~~~~~~
written by: Nicole Rodgers


