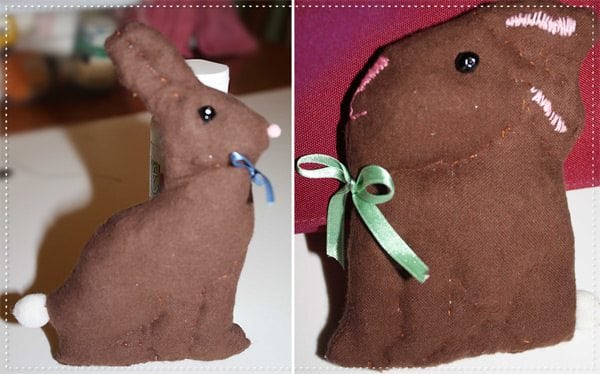
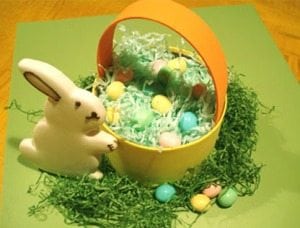
The Budget Diet

A diet for your wallet...not your waistline!

Category : Easter

I have a frame on my kitchen counter that comes and goes depending on the season. It started with a Halloween free printable that said, “Eat, Drink and Be Scary.” I put it away after Halloween, and then I pulled it back out for Christmas to frame “Keep Calm and Jingle On”.

When I was cleaning up my Christmas decorations this year, I thought to myself…why not find free holiday printables that I can rotate throughout the year? I’m partial to the Keep Calm printables, so I’ve put together a collection with one for every major holiday – Valentine’s, St. Patrick’s Day, Easter, Fourth of July, Halloween, Thanksgiving and Christmas. Print them out for yourself or give them as a gift, after all…they’re FREE, and they’re festive!

If you’re not familiar with free printables, just click the image that you want, and you’ll be directed to a page with the instructions for printing…you’ll even be able to choose your size (8″ x 10″ or 5″ x 7″).

Tell a Friend

Shop Amazon – Fill Easter Baskets – Toys Under $10

This offer valid through 12:58am on Saturday April 7th, 2012

Tell a Friend

By Bonnie Arena

When an old friend suggested that I purchase a chocolate Easter Bunny for my grandson who is 8 months old, I had to laugh to myself, but that gave me the idea for these two “chocolate bunnies” made from some left over fabric and repurposing those plastic shopping bags that we have too many of and don’t know what to do with!

Drop in a few jingle bells left over from that Christmas project you made, and this becomes a soft, crinkly, jingly, washable toy for a sweet little boy or girl who isn’t quite ready for a real chocolate bunny.

felt bunny

felt bunnies - finished

Materials and Tools

    Tools:

  • scissors
  • pins
  • needles
  • sewing machine
  • thimble
  • pliers
  •  

    Materials:

  • Print-out of a chocolate Easter Bunny, your choice of style and size
  • brown flannel, corduroy or other chocolate colored, washable material (you can use felt if you don’t plan on washing)
  • brown thread; pink, black, white and brown embroidery thread
  • scrap ribbon
  • tiny pink pom-poms
  • ½” white pom-poms
  • jingle bells, various sizes
  • small black beads
  • plastic shopping bags, fiber-fill, old stockings, or other repurposed material for stuffing bunnies.


repurpose

bunny print out

Making the Stuffed “Chocolate” Bunnies

1. After printing a picture of your favorite chocolate Easter bunny from your computer (I went to Google Images, found the bunnies that I wanted, copied them into a Word document, sized to 4-6” and printed)—cut out and place on brown fabric, double thickness, right sides together.

2. Pin to fabric and cut out leaving at least 1/4” around the outside of the bunny. Right sides of the material should be together so that you’re ready to sew the two pieces together.

felt bunny

bunny on sewing machine

3. Leave the paper pattern right on the material and sew closely around the edges of the pattern, leaving the bottom of the bunny open for stuffing. After straight stitching go back around the outside of the pattern using a zig-zag stitch. Remove paper pattern.

4. Turn material right side out, making sure to turn out the ears and other angles fully.

repurposing

plastic bag filling

5. Stuff bunny using shredded plastic bags, fiber-fill, or old stockings. I used plastic bags to create a crinkly sound when the bunny is played with, but I did find it difficult to sew through when doing the hand sculpting. I used scissors to push stuffing into the bunny’s ears, nose, and other detailed edges. I also randomly dropped in jingle bells so that the bunny would rattle when shook by baby. Once the bunny is fully stuffed, sew up the bottom of the bunny, tipping edges under and whip-stitching by hand.

easter crafts

stuffing and sculpting

6. Using brown embroidery thread, follow the paper pattern to create sculpted ears, head legs, feet, etc. Push needle through both sides of bunny, making sure that the needle comes out of the opposite side of the bunny in approximately the same place on each side of the bunny. Work back and forth, using small running stitches, pulling tightly to sculpt the bunny. (TIP: This work is a little difficult if using the plastic bags, especially if stuffed tightly.)

7. You’ll also have to work jingle bells into positions that won’t affect the sculpting. I used a thimble to push the needle through the bunny and a pair of pliers to finish pulling the needle through when it was difficult to get through. This part of the project is great to do while watching American Idol, since it will take a little time.

repurposing

finished bunny!

8. Finishing touches: I used small black beads for eyes, scraps of ribbon to make a bow, pink embroidery thread for nose and ears of one bunny and a tiny pink pom-pom for the nose of the other and ½” white pom-poms for the tail.

I sewed on all details VERY securely, knotted and hid knot by pulling tail of thread through the body to an outer edge and cutting thread so that there would be no loose ends, and no worry of baby pulling off the small pieces and swallowing.

NOTE: these bunnies would also be cute as decorations for years to come, even after Baby can enjoy real chocolate bunnies!

~~~~~~~

Bonnie Arena loves warm spring days, crafting for her grandson and cats with especially loud purrs. She writes for FavorIdeas, a delightful spot to find personalized favors or baby favors for your next home event, baby or bridal shower.

Tell a Friend

easter crafts using recycled materials
It’s nearly Easter, and that means an Easter dinner with family and/or friends for people who celebrate the holiday. It is always nice to see a pleasing, Easter/Spring themed centerpiece on the Easter supper table . Additionally, it is so easy to create a recycled Easter basket, that you can make more than one for your children. Let’s take a look at the 10 easy steps that you need to utilize, in order to create these delightful baskets.

Step 1 – Securing the Inner Basket

Think about what you have in your home to use for an inner basket. This can be something like a plastic milk gallon jug, paper food container (used for dry food, such as oats), or even utilizing a bread basket that you rarely use. Depending on how many baskets you would like to design, think about what would be easiest for you.

Step 2 – Securing the Outer Basket and Handle

The outer basket consists of either recycled construction paper or foam. Spring pastel colors like yellow, blue, orange, purple and pink are the most popular choices for Easter basket construction.

Step 3 – Securing the Tools to Create Your Basket

You will need a pair of scissors, a glue stick (or rubber cement), and either crayons, paints, or colorful markers that you will use to decorate the outer part of your basket.

Step 4 – Creating the Basket Portion

Ensuring that your inner basket is dry, merely cut your milk jug or dry food container in half. Set it aside.

Step 5 – Creating the Sides of the Basket and the Handle

Utilizing recycled construction paper or foam, fit pieces around the inner basket firmly. Cut the pieces out, then glue them around the inner basket. Cut a 3 inch by 18 inch strip of paper and glue it from the top inner sides of the basket for a handle.

Step 6 – Allowing for Drying Time

Learn what the drying time is for use with either a glue stick or rubber cement, or whatever you decide to glue your basket together with. Take that time and double it, if possible.

Step 7 – Designing your Basket

Utilizing either crayons, paints, a stamp kit, stickers or markers: now is the time to decorate your basket! If you have a child or children, this is a fun, creative family endeavor to work on together.

Step 8 – Filling your Basket

Fill your basket and place it in the middle of your Easter dinner table, unless you will use one or more baskets for children. Of course, part of the fun of Easter baskets is hiding them, so you might want to consider that.

Step 9 – Displaying Your Basket

If you choose to display your basket, think of placing it on either real or plastic “Easter grass”. Along with its contents, it is sure to delight your Easter dinner guests.

Step 10 – Storing Your Basket

When Easter has passed, store your basket using a large box that can accommodate height, with possibly a few more inches. Store it safely until the next year.

Following the ten easy steps above will help you to create one or more recycled Easter baskets that you can use for years, with the potential for minimal repairs to consider, on occasion.

~~~~~~~

written by: Nicole Rodgers
Nicole Rodgers has been blogging on a variety of topics for 3 years; she currently contributes to blogs about where to find a free credit score reportand great deals on green t shirts online.

Tell a Friend

A program for serious savings! $29 includes:

  1. A series of 4 challenges which can be completed in 8 weeks, but they may take longer depending on your situation.
  2. Personalized feedback after you complete each challenge
  3. Personalized e-book of Shape Up Tips to slim your budget for life!
  4. I'm ready to shape up...enlist me now!