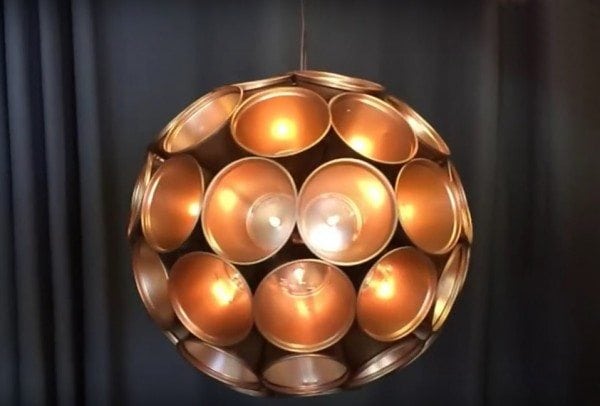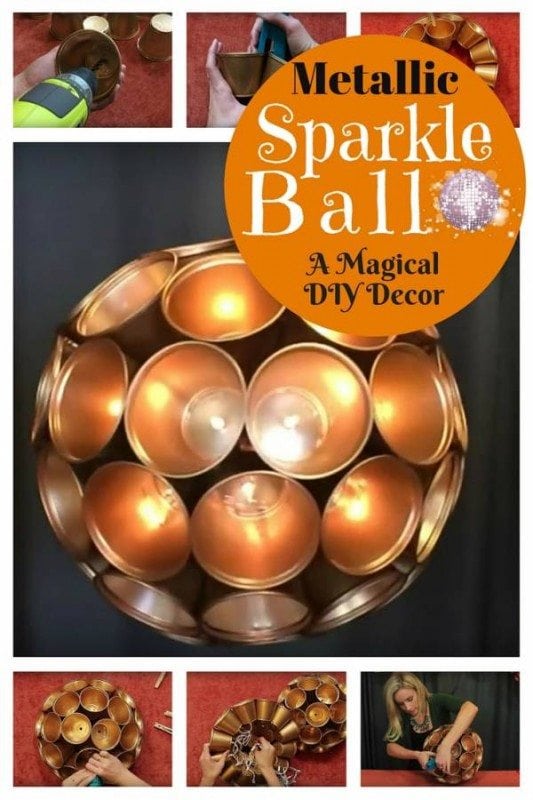
A sparkle ball is one attractive decor for the coming holidays that provides beautiful and magical lighting at night. Whether you hang it on your patio or on your window, it is surely a head-turning DIY craftwork your neighbors will be envious of. If you aim to surprise guests with enchanting lighting this coming Thanksgiving, read on for the step-by-step instructions to know how to make your own metallic sparkle ball.
What you need:
- 50 White Mini Lights
- Drill
- Stapler
- Clear Plastic Cups
- Metallic Gold Paint
Lay the 50 clear plastic cups on the working area. With the metallic paint, start painting either the inside or outside of the cup, it will still yield the same result. If you are painting inside, have the cups facing up and paint in a circular motion making sure the entire cup is completely painted. Ensure that all the cups receive an even coating. Let it dry for about 30 minutes.
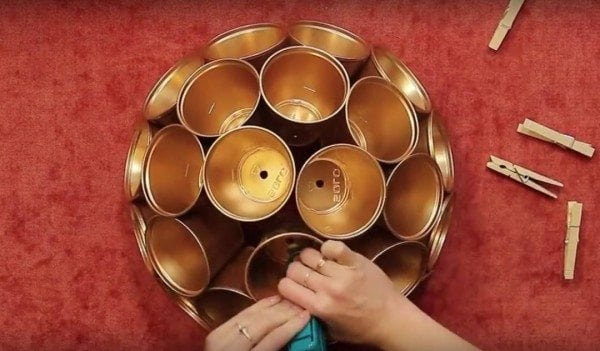
Get the drill and start drilling holes on the cups. First, hold the cup either facing you or away from you and drill at the center. Insert one mini light to check if it fits. If the hole is not big enough, then you might have to widen the hole a bit more. Make sure to do this before doing the same with the other cups.

Now, we are going to create the ball. To make it easy, we are going to create two halves to create the perfect ball. Grab two cups and staple them together. Place the third cup beside the first two and staple it. Continue adding cups until you achieve the perfect base circle.

Next, we are going to create the second layer with the same step. To properly position the cups above the bottom, you may use clothes' pin to keep them in place before you staple them. If all the cups are set, then staple them together with the bottom layer.
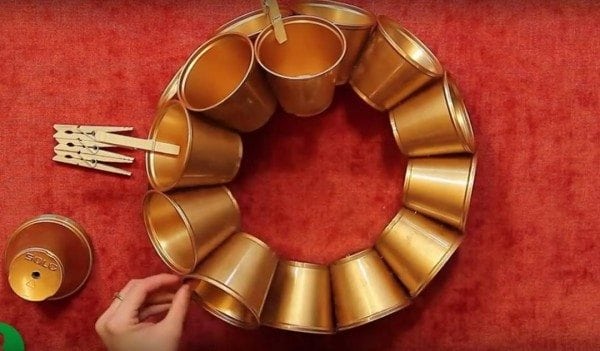
Grab three cups and place them on top creating a triangle. Staple them with the second layer as well as staple the cups side by side to create a sturdy half. Once done, repeat the steps to create the second half.
Next, add the lights. Flip over the first half of the ball and insert the mini lights one by one into the holes of the cups. Do the same with the second half. Bring the two halves together. You may let the power cord hang out or place it inside and insert an extension cord – whichever works for you.
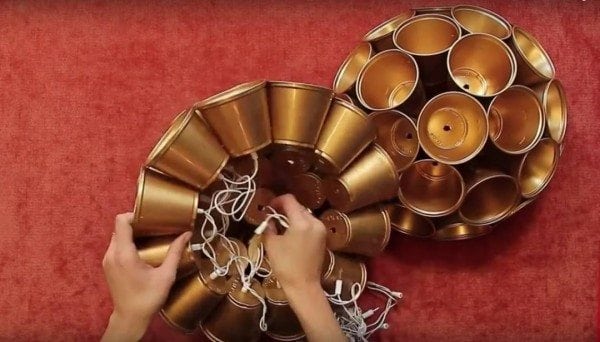
If you are satisfied with the position of the lights and the power cord, then it is time to staple the two halves together.
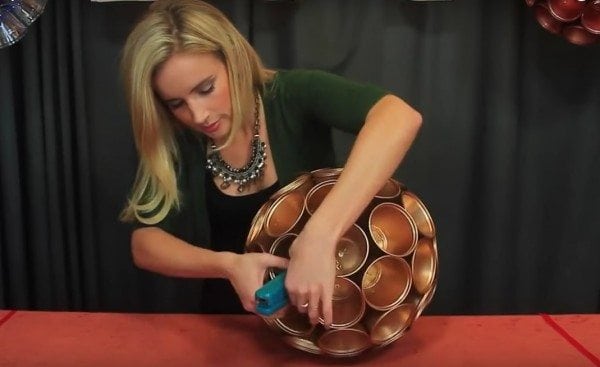
And you are done! Light it up and enjoy its happy glow!